Launching your Lighting Career on the Right Foot

This is dedicated to all of the young minds that are graduating from a higher learning institute this spring, or this month, depending on the school you have chosen. Also, these are the suggestions and opinions of a person who started out on this path many years ago as a bright eyed young lad who thought he knew a lot more than he actually did.
The road to your future is yours to explore and navigate any way you see fit. The key here is making the right decisions and forming good habits right away. Hopefully you chose good mentors during your primarily educational portion of your career. I say primarily educational portion because the education never ends. Here are a few habits that you should adopt immediately no matter where you choose to start working;
- This is the number one rule to live by in this industry. This rule should never be broken! Always try to be friendly, humble and open to ideas. Sound easy, but it’s not. There are tons of different personalities and backgrounds in the industry, and you have to find common ground with all of them. When you are making the break from the educational world to the professional world, it is a huge change. Think about it this way, there are some amazing quarterbacks in college football who have huge numbers and are great prospects for the NFL, but then when they get to the big dance, they either ride the pine for a few years, or fail all together. You are going to have to pay your dues for a while in your pro gig. It does not matter if you were the best lighting person that your school ever saw, you still have to prove yourself again. The best way to start is to be friendly, humble, and open to new ideas.
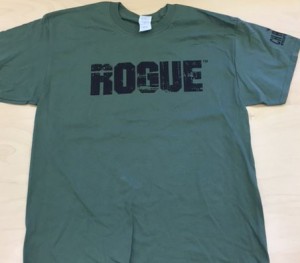
- Leave your school shirts at home. I know you have a closet full of show t-shirts from your school. I know you are dying to wear one to work. Don’t do it! Here is why – Let’s say you wear your lucky “Into the Woods” shirt you got in your freshman year with your school’s name on it and it happens to be a rival school that your crew chief attended. Welcome to a rough show run. Oh, and here is the other reason why – Nothing says NEW GUY like a school shirt. Until you get some show cred or get some swag from your gig, stick with a black shirt. Don’t worry, once you attend a few tradeshows, you will have more manufacturer shirts than you know what to do with.
 Trade this shirt up for something like this one –
- Show up with the right tools, but take the tags off. Again, you are the new person on the gig, but you don’t need to look like it. I love shiny new chrome, but you need to take the tags off before your get to work. In fact, I would suggest picking up hand tools at a flea market if possible. They are broken in and cheap. Kline tools are great, but they are expensive and grow legs really easily. Don’t take them to work! Also, you don’t need a ton of tools to start with anyway. If you are starting out as a deck electrician, which is a good place to start, here is what you are bringing with you on day one:
- Adjustable wrench (Crescent wrench or C-wrench). I like the ones with the 8” handle. It gives me enough torque to get clamps undone if some muscle head over tightened them.
- Speed wrench (ratcheting open end / box wrench) in two sizes – 18mm and 19mm. The 18mm will open almost all metric clamps, like the ones that CHAUVET sells, the 19mm will open all of the 1Ž2 inch bolts on imperial style clamps, like the ones you will on mega claws. I suggest the 19mm over the 1Ž2 inch because if you are buying a set, you can stick with a metric set instead of having to buy a metric and imperial set. You can also find these in singles as well.
- #2 Philips screw driver with a minimum of a 6” and maximum of 8” shaft. Any shorter and it will let you down, any longer and it is uncomfortable.
- 6” flat head screw driver. You will never need a longer one.
- Razor knife. Don’t spend a ton of money on one, it won’t be the last one you buy, but you have to have one. It is OK to lend this out. You will most likely get it back
- Pocket knife. Spend a little more money on this and don’t lose it. It is not OK to lend this out. This is yours and a pocket knife is very personal. Take some time in choosing one and make sure it locks when you open it. Keep in sharp and do not use it to cut plastic wrap or tape. That is what your razor knife is for.
- Multi-tool – this is optional. I used to be a big fan of the Gerber style, until they quit making the flick open style. Now all they have is the fold open style and the tools are hard to get out of the handles. These guys can get expensive quick, so be careful.
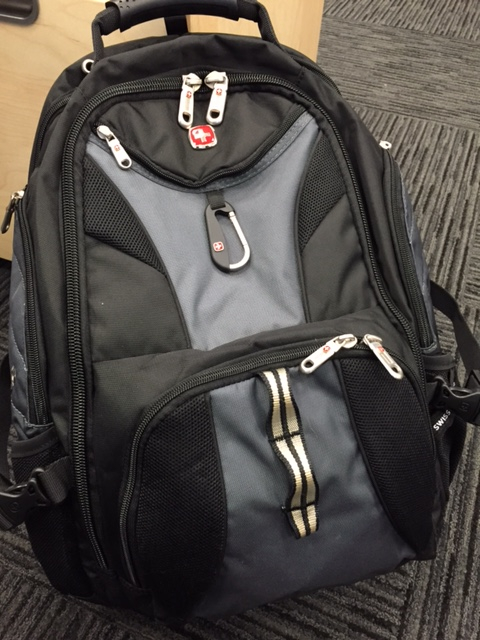
Now that you have your tools, how do you label them so that the world knows they are yours? You can either paint a stripe of color on them, or pick two colors of electrical tape. I prefer the two color tape. And you need a bag. A good backpack is fine. One with a lot of pockets is great. I like the Swiss Gear ones. They are a few bucks, but they last.
- Be observant. Watch what the rest of your crew is doing and how they do it. This is especially true in the very beginning of your career. There are many paths to arrive at the same destination. Seeing how other people get there will add to your personal experiences.

- Entertainment lighting is an art form. It might be your design; it might be someone else’s. None the less, it is someone’s art. Treat it with respect. You might not like the design or the method that it is being applied, but always keep tip number 1 in mind and you won’t go wrong.
So, welcome to a fascinating field of employment. There are a lot of really cool people in this industry and there are tons of opportunity to do amazing things and travel to interesting places. You never know where you are going to end up or who you will meet along the way. Be kind as you navigate your career and you will never go wrong.


 This is from our CAD file for LDI 2015. This image shows our numbering of the fixtures. The Fixture number is in blue, which will be for universe 8 the name of the fixture is in magenta and the weights are in black. The red lines are our power runs, which we will cover in an upcoming blog.
