
    Happy Holidays – CHAUVET Professional style at Aventura Mall

    Join on us location at Aventura Mall in sunny South Florida for a tour of their holiday display.  To light the design they used a total of 109 CHAUVET Professional fixtures.  38 Ovation E-190, 55 COLORado Zoom 1 & 2 Tours, and 16 ROGUE RH1 Hybrids.

    Planning Out Your Installation

    HebronBaptist
    Working out a plan for designing a permanent installation can be a daunting task. There is a lot to think about, especially since this is not a one and done job. This is going to be around for a long time and your efforts will be reflected in the outcome for years to come. No pressure here! Here are a few suggestions for getting off on the right track with your job.
    1. Figure out your budget and end goals. Have a clear vision of what you want to achieve and when you want it done by.
    2. Find a good consultant. There are people out there who do this kind of stuff for a living. Work with them to find a solution that best suits your needs. If you have questions, ask.
    3. Understand from the start that there will be delays in the process along the way. Some of these delays are good, some are not so good. Either way, they are going to happen, so prepare for it by under promising and over delivering.
    4. Specify products that are designed to last for a long time. Stay away from inferior products.
    5. Think in and set milestones. Work with your consultant on figuring out what needs to be done by when.
    6. Hire a professional installation team. Installation work needs to be as perfect as possible. If you don’t think you have the amount of experience it takes to get the job done, hire someone who does. This will save you a ton of time and money in the long run.
    7. When the installation is nearly complete, bring in your operational crew and start training. It is always an advantage when your crew can get some time with the installers to learn how your gear should work.

    Lord of Life  6

    If your installation is a long term project and you budget depends on installing in phases, I highly recommend the following three phases
    Phase 1 – Get the installation open. Since you have an overall plan of what your finished project will look like and consist of, get your complete infrastructure installed. All of your electrical lines, data lines, and networking needs to be done in phase 1. Any rigging points should also be added in here. I suggest this so that as move forward in additional phases, your backbone is already installed. While the cost of installing all of the electrical and communication lines might be high, they will be higher down the line if you have to take gear down to add in additional power and data. Same goes with rigging. The more you do on the initial installation, the easier it will be to add in lighting and AV gear down the road. In phase 1, you will have a basic lighting and audio package. This is designed to get your installation open. This package may not include any moving lights, just the front, side and rear lighting that you need so that your stage is not dark and enough audio so that your audience can hear what your talent is saying and that the band can be heard. You may even choose to rent gear knowing that you are going to purchase later. Sometimes renting gear might be a better long term solution depending on your situation. If you want to stay on the cutting edge of technology, then renting is the way to go. If you are content with setting up a rig that your crew can learn and use easily, then purchasing is a better option.Lord of Life 4
    Phase 2 – Add in more gear. You already have a basic lighting and AV package. This means that you have the essentials covered; now you want to start adding in fancy gear. In phase 2, if your project calls for it, this is where I would add in the video package. Whether it is video walls, or projection screens, this is where I would add them in. I would also add in any additional audio needs that are part of the project. Audio and video are big impact items. By adding them in during this phase, your clientele is going to notice a big change and is likely to stay interested in your project. If you are relying on donations for your budget, this is something to keep in mind.
    Phase 3 – This is where you finish up. Add in the moving light package here. By adding in the dynamics of moving lights, it puts the dot at the end of the sentence as far as your installation goes. Also, since you already have the rigging and electrical in place, you should be all set to add them in.
    By planning and sticking to your plan, your installation will be something that you can be proud of from the get go, then by adding in additional gear as your budget allows, you will be able to achieve your complete vision. Now go forth and build something cool.

    EmanuelBaptist3_300

    Getting More From Less – Positive Usage of Negative Space

    Under natural light, there is always shadow. Look around you and you will see that almost every object you look at has some kind of shading on it. This helps our eyes to define dimension. Without shadow, or negative space, everything would look flat and two dimensional. This is something to think about when you are designing lights for staging.

    IMG_3197


    Shadows from the tree on the left are casting over the wall and the ground.  This shadow provides us with negative space and helps our brain understand dimension.


    Having stereoscopic vision (or stereopsis) ensures that we can see in three dimension. Because our eyes are both facing forward, but are set of both sides of our head, each eye picks up different visual information and sends it to our brain. Try this…. Pick out an object look at it. Then close one eye and look at the object again. You will notice that the object looks slightly different and the dimension is gone. Our eyes are also trained to look for light and dark spaces to help us to determine what the shape is that we are looking at. By seeing the shadows, we can get a good idea of how big something is, what it’s shape is, and relative distance from one thing to another.

    Enough science. Let’s talk about practicality. In stage lighting, one of our goals is to get as much light from our light source to the object we are lighting as possible, typically. We talk about flat beams all of the time and how these beams get more light to the stage. This is absolutely true. Having a larger beam angle and either a tiny or non-existent field angle is always a good goal when picking a beam or spot fixture. So, with lights like this, how do we create definition with flat light? Take a walk through the woods during a sunny day. The sun creates extremely flat light, but you will notice that there are shadows all over the place. As light travels through the trees, shadow is created.  These shadows create a ton of definition on the ground and make your eyes really happy. Another example is a sports field. Stadium light is really flat and even when it hits the ground, but the players themselves create shadow so that your brain can see the dark spots on the ground and define dimension. We can do very similar things on stage with gobos and set design.


    When designing front and side light positions, many designers will use break up gobos to light their subjects in addition to wash lights. This will help to add in shadow and negative space on their subjects and help them to appear more natural. For this, I like foliage breakups. I will typically light a subject either from the front or the side with a foliage breakup, and have it slightly out of focus so that the shadows appear more natural. By making this addition, I am helping to make our brains think that the subject on stage has dimension and depth.


    The same goes for scenery. Having shadow on scenic elements helps your brain to define what the object is supposed to be. This means that if you are using painted flats, you have to paint in shadow to make the appearance of dimension. If your surface as actual texture and angles that create shadows, use them to your advantage. These breakups will make your set much more realistic. I also use gobos in hard focus coming in at steep angles to create areas of shadow and light. This helps to make the set more interesting and less two dimensional.

    gal_atmos_3


    The above shot shows great usage of negative space and texture.  The MIAMI sign has a shimmer texture on it.  The letters are uplit from an angle to get the most shadow possible to give it dimension.  The black background further adds contrast, then the silhouette creates additional negative space to add to the overall texture and create a very dynamic effect.

    By using shadows to create negative space, you will be actually making you scene appear more natural. Never forget that lighting in nature is rarely balanced and without dark spots. There are shadows everywhere, embrace them in your designs as you do in real life.

    Squeek Lights Gets Creative With CHAUVET Professional On The Wonder Years Tour

    IMG_8784-1 NEW YORK– Even by the standards of pop punk, a genre famous for blending outrageously divergent sounds, The Wonder Years stands out for its incredibly wide-ranging style. Deftly swinging from subtle melodies to heart-pounding choruses in the blink of a musical eye, this freewheeling band from the Philadelphia area takes fans on an emotionally charged journey with every performance. Lighting designer Victor Zeiser of Squeek Lights and lighting director David Summers visually capture the eclectic pop punk band’s spirit on its current Fall Tour with a multi-faceted light show featuring a collection of fixtures from CHAUVET Professional.

    IMG_8749-1 What makes Summers’ role in this endeavor especially impressive is that it represents his first effort as a lighting director. “The Wonder Years had decided that in addition to being their tour manager, Dave was also going to become their LD,” said Zeiser. “He showed me a bid from another lighting company that wanted to send out some decade-old gear, so it was quickly decided that Squeek Lights would work out a package for him as well as create a design and program a show for him to travel with on the tour.”

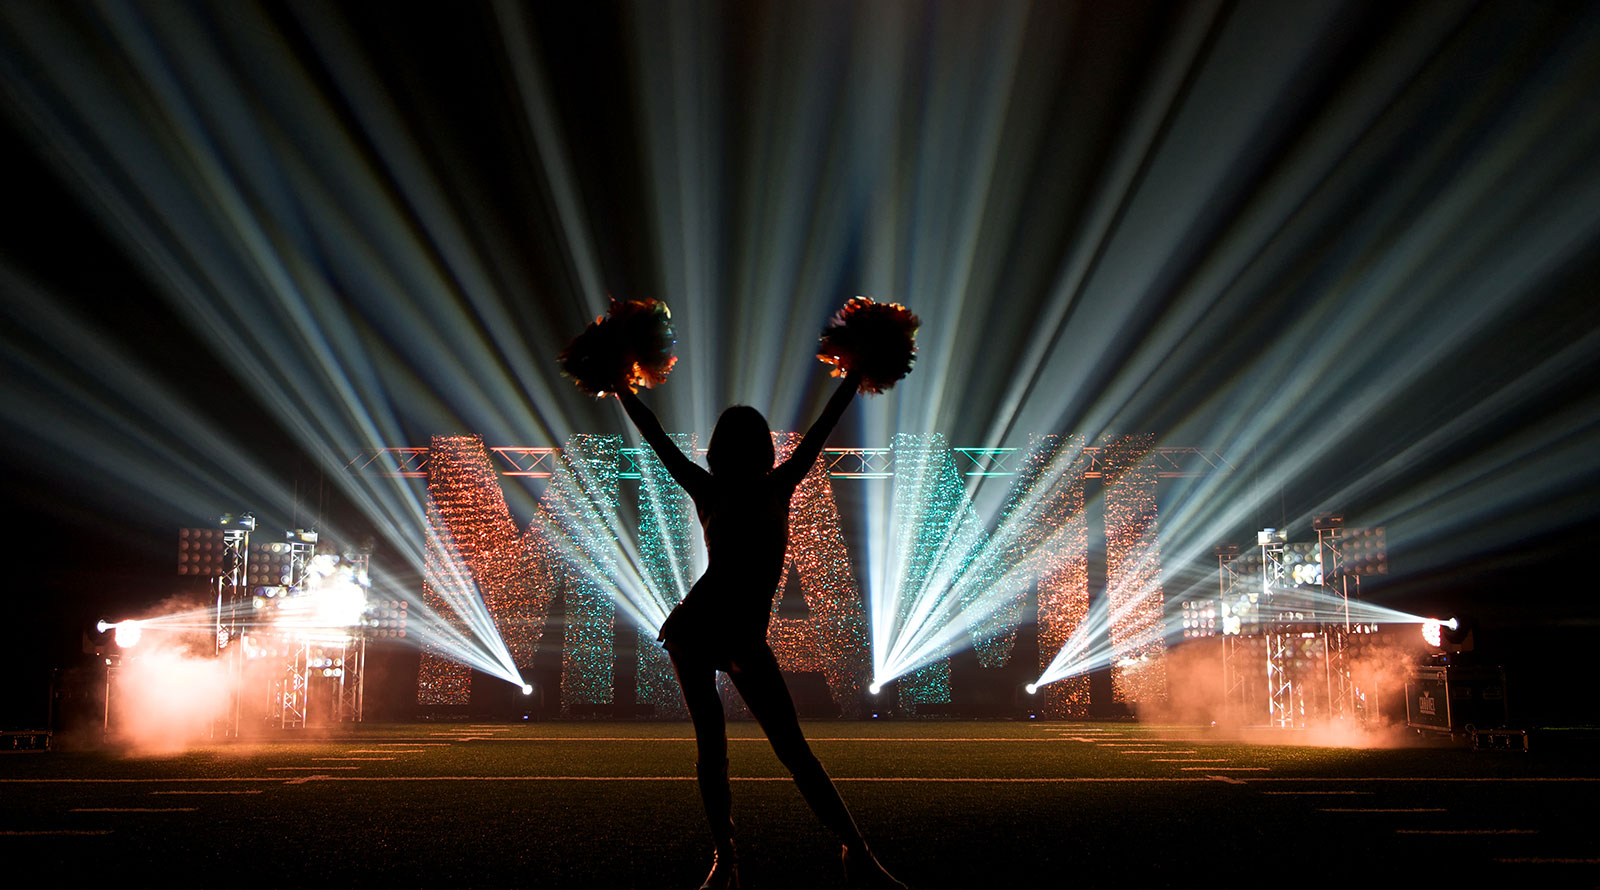
    Drawing on Squeek Lights’ extensive inventory of LED fixtures, Zeiser put together a package that included Rogue R2 Washes, Nexus 4×1 bars, COLORdash Batten-Quad 6 fixtures and Vesuvio foggers. Most of the fixtures were positioned on six upstage towers to create a consistent look throughout the tour despite variations in stage sizes and to deliver sweeping mood changes.

    _MG_9494-1 The six towers range from 6’ -10’ in height. Each tower has an R2 Wash on top with a 4×1 Nexus bar hung vertically below it. At the base of the towers are clip lights just peeking over the amp line. COLORdash Batten-Quad-6 fixtures are used to provide side light. A group of four Vesuvio foggers is positioned vertically along the downstage line.

    “We wanted to strike a balance of creating a high energy show that isn’t exhausting for the crowd to look at,” said Zeiser. “We have a lot of really bright looks with lots of movement, but we even out these looks with moments when only one or two lights are on.”

    _MG_9438-1 Explaining the small clip lights on his rig, Zeiser noted, “Dave had a really great idea for some work lights to provide a tungsten look, so we got him some small dimmer packs and purchased 10 clip lights from a Home Depot. There is a point in the show where we direct all the R2 Washes down at the band, zoom wide in a deep blue and push the clip lights bright — it is really beautiful!

    “During the first concert in New York, during this part of the lightshow, a circle pit opened up and instead of the normal insanity, couples started slow dancing in our light,” continued Zeiser. “I’ve never seen anything like that happen before! On the flip side of things, during the biggest moment of the show, we have four Vesuvio vertical foggers lining the downstage edge, and when we let those rip it pushes things over the top.”

    _MG_9430-1 Keeping pace with a band that eagerly moves from the soaring to the soulful required a procession of fresh looks. Zeiser and Summers served up these looks by sprinkling the stage with different beam angles and pouring a rich array of colors across it and the audience. The pair also relied on atmospherics to create some magic. “A fun gag Dave came up with during programming with the Vesuvios was to turn off all the other lights and just use the lights in the foggers to uplight the band members for one song,” said Zeiser. “This creates a moment totally different from the rest of the show. Getting that variety is key on this tour.”

    Zeiser described how the different fixtures in the rig contributed to the eve- changing looks he and Summers laid out on the stage. “With the exception of the Home Depot clip lights, the entire rig is Chauvet,” he said. “I love how tight the R2s’ zoom can create a punchy beam, but then it can also get wide enough where the six units can wash all the guys when we flip the lights around. The range of colors we get with the Rogues is great, and the ring effects provide a quick and dirty way of adding some texture to the look. I chose the Nexus fixtures because I love how they look pointed at the crowd, and it provides a nice layer of visual interest at a low intensity as well as being able to be used for audience abuse when we let them rip.”

    _MG_9413-1 There was also a practical benefit Zeiser considered when putting together the rig for The Wonder Years. “When I was told space in the trailer was a big concern, I decided the R2 washes were the fixture of choice,” he said. “All six of our R2 fixtures fit in a single case, and all six Nexus units fit in another small case. This makes it super easy for them to deal with on the road.”

    That proverbial road is taking The Wonder Years Tour across the US in less than two months. The pace on this journey can be hectic, but it’s been made easier for Summers by some user-friendly fixtures and the opportunity to push his lighting ideas to the limit for a band that blows past musical boundaries.

    _MG_9391-1

    Keeping Your Fixtures Organized – Numbering Your Plot

    During the design phase of your project, keeping yourself organized is critical to the overall success of the project. Knowing where your fixtures go is really important not only to you, but to the people who are building your rig. By following a few simple steps, keeping your fixtures numbered in order will greatly help your crew to build the rig as you envisioned it relatively easily.

    So, you have your structure designed. All of your trussing is in place and you have figured out your scenic elements. It’s time to start placing fixtures in your design. For me, the first things that I add in are my essentials. These are fixtures that I know I have to have to make my design work.   This would include any truss warmers and lights that I have to have to make my design work. After that, I add in the lights that will make my show look cool.

    This image is from our WYSIWYG design of LDI 2015. This is the circle truss that was in the center of our booth
    This image is from our WYSIWYG design of LDI 2015. This is the circle truss that was in the center of our booth.

    Once you have all of your fixtures placed, you need to go back and number them. The method that I use for this is a combination of fixture ID numbers, DMX addresses, and IP when we are using Art-Net enabled fixtures. On my plot, you will typically see three things, the name of the fixture, its ID number and its weight. OK, I am going to stop right here…. Why do we add in the weight of the fixture to the plot? Well, I do it to try to make my riggers life a little easier. The riggers have to calculate weight loads per point. If I include the weights of the fixtures, it saves them a lot of time, and their time is not cheap… Now back to our regularly scheduled article… I always start my ID numbers with Truss warmers. I number the truss warmers first because they are always the first lights that go into the truss and I typically use DMX universe 1 for all of my truss warming. This does two things – 1 all of my truss warmers are in numerical order from upstage to down stage. They are also in DMX order from upstage to down stage. This makes pixel mapping them much easier for the designer. Once this is done, I continue labeling fixtures ID numbers in a linear manor from upstage to down stage from stage right to stage left. I also try to keep my DMX numbers in the same configuration. This way, I do not have to run multiple DMX universes to the same areas of the truss. This minimizes confusion during load in.

    "ThisThis is from our CAD file for LDI 2015. This image shows our numbering of the fixtures. The Fixture number is in blue, which will be for universe 8 the name of the fixture is in magenta and the weights are in black. The red lines are our power runs, which we will cover in an upcoming blog.

    I use a separate document that has more details related to the fixture addressing, ID number, type and any notes that I need to communicate to the load in crew.    After that is done, I then print out two sets of labels.   One set is attached to the truss, the other is attached to the fixtures. This makes it much easier on site to know which fixture goes where. Also, if we have to replace a fixture during load in, the DMX address information is right at the fixture location.

    circle truss stickers


    The stickers contain all of the information that is needed to make sure that the right fixtures are in the right places.  Universe 8 is designated as blue, the DMX addresses are present, along with the fixture ID numbers, and finally the type is also shown.

    Making the final product look like what is in your imagination is the best part of the challenge.

    Making the final product look like what is in your imagination is the best part of the challenge.


    As I have said before, a good design starts with good planning. You should always be thinking about how the show will load in while you are designing it. The whole key is consistency and communication.  Keeping your fixture labels consistent between all of your documentation will save you a ton of time on site and will make your crew’s life much less stressful.


    LDI 2015 – It Was an Absolute Blast!

    LDI 2015 booth #539  (AKA CHAUVET Professional) was a hotbed of activity from the time we got there till the time we left.  Our entire crew put in a ton of effort in getting our booth up and looking sharp.  We would like to thank everyone who helped us out on this show or provided gear and support.  Kinetic Lighting provided us with a fantastic design and programming team,  Rachel Miller and Geoffrey Galper.  Atomic Design and Showcat provided us with the scenic elements, and Farrington Productions provided us with the amazing costume and mannequin that we used in the Ovation area of the booth.  Thank you all, we could not have done it without you!  Check out some of our favorite images from the booth.


    _STE2633

    _STE2742

    _STF4531

    _STF4560

    _STF4579

    LDI 2015

    LDI 2015

    LDI 2015

    LDI 2015

    DSC_0725

    DSC_0723

    LDI 2015

    LDI 2015

    It’s LDI Time Again!

    October is one of our favorite months.  Fall baseball (go Cubs!),  football is back in full swing,  the leaves are changing amazing colors, there is a crispness in the air, and it is apple cider season.  Oh, and its LDI time!

    That’s right, LDI is just around the corner.  Las Vegas is about to get a dose of entertainment lighting professionals that it has not seen since, well… last year.  The Las Vegas Convention Center is about to get transformed into a maze of lights, haze, and madness that would make Jimi Hendrix envious.  We here at CHAUVET Professional have been getting ready for LDI for quite a while now.  Not only have we designed a very cool booth for the show, but we are also launching some extremely hot new products. For those of you who are coming to the show, please make sure to not only come in the booth and check out our products, but also say hi!  We are always happy to see our friends at the shows and get some in person face time.

    For those of you who will not be coming, we are sorry that we will not see you, but make sure to  to check out the videos and pics from the show that we will be posting on Facebook, Twitter, and Instagram during the show, then on the blog after the show is over.

    So, for a sneak peak at what’s new at CHAUVET Professional, Check out these videos –

    CHAUVET Professional Nexus Creates Dance Club Look At OnBlackheath Festival

    Onblackheath 2

    (London, UK) The OnBlackheath festival in South East London has quickly established itself as one of England’s most popular late summer music events. Set on the picturesque Blackheath Common, the two-day gathering features an eclectic mix of live music and pop-up food stalls, an alluring combination that earned it five nominations for Britain’s Festival Awards in 2014, its very first year of existence. This year the festival turned up the juice even more with a new “Make Noise” DJ stage that featured EDM stars like Erol Alkan and Grammy-winner Tom Findlay (Groove Armada), along with a dazzling array of 28 pixel-mapped Nexus 4×4 LED panels from CHAUVET Professional.

    When festival supplier London Speaker Hire approached John Rogers to design a lighting concept for the Make Noise stage, Rogers decided that the direction of the design should take on an obvious club persona. “With the stage being devoted solely to dance music, I wanted the lighting to reflect that and make it immediately apparent to you as you approached the tent,” commented Rogers.

    Onblackheath

    Rogers conveyed his dance club messages on stage by arranging his ensemble of Nexus 4×4 panels in a floor-rigged design, then making them come alive with a variety of pixel-mapped driven looks. These intense pixel-mapped patterns, along with the “colored fog” from six CHAUVET DJ Geyser RGB foggers in Rogers’ rig, transformed the stage, giving it an undeniably club-like feeling.

    “In terms of looks I wanted a high-impact fixture that suited pixel mapping, and, seeing as I had used the Nexus 4×4’s previously, it was an easy decision,” continued Rogers. “It’s not the first time I’ve programmed and operated with them. They’re really bright and they mix color very well, especially considering they’re RGB fixtures. The 4x4s are so punchy, at times I had to pull intensity out of them to stop them washing the movers and front lights out.”

    Rogers controlled the entire show via an Avolites Quartz console running Titan 9.1 software, which enabled him to make the most out of the fixture’s pixel-mapping features. “The 4x4s are really generous in allowing 3-pin, 5-pin and ArtNet connections, so I knew whatever I decided to do in terms of data runs they’d be versatile and not dictate how I’d have to run my lines,” he said.

    Onblackheath4

    As the festival has quite an early curfew, half of the acts were on in daylight. The six Geysers, which Rogers integrated into the set, were by all accounts his secret weapons to creating the desired club atmosphere. “I really relied upon the Geysers to create that murky evening club feel in broad daylight,” he said. “It’s always a bit of a fight against the daylight at a festival, but the Geysers added a stand-out effect that pulled in crowds of all ages to dance throughout the day. The added bonus of the dense haze filling the tent meant that the lights were always part of the show.”

    As OnBlackheath is a family-friendly festival, in the daytime kids could be seen dancing with their parents in front of the Make Noise Stage. At night, however, the stage took on a different persona. Continued Rogers: “Once the sun went down the whole mood of the tent kicked up a gear with the Nexus and Geysers delivering the ‘club’ atmosphere that I wanted to achieve.”

    Onblackheath 3

    Rogers concluded: “Erol Alkan closed the stage on Sunday, and was nice enough to say that the lighting was fantastic after his set! I really had fun designing this lighting concept and I think the Chauvet fixtures were a huge part of making the Make Noise stage stand out across the site.”


    Lighting Insights October 2015 – Sam Bowden Talks About Dynamic Video Setups

    Want to expand your video display, but can’t make the investment in a gigantic wall? No worries, you can still get a big video look without a big investment by mapping the appropriate fixtures with video content so they work with your panels to immerse an entire stage. Chauvet Europe’s Sam Bowden shows how it’s done in this informative video.


    Take it away Sam!!!