
    Blog Series: Tech Talk

    Last Week’s TOP TEN POSTS on the Chauvet Professional Blog!

    We love seeing what tickles your fancies on the Chauvet Professional Blog!  This week is no different, we’re always so glad to see your repeat visits and comments — we thank you for checking us out!

    Last week’s TOP TEN POSTS on the Chauvet Professional Blog!

    Starting with the #1 most visited post of the week, and STILL killing it after three weeks:  Cat West, Lighting Director for KASKADE, Rocks the Rig AND the STAR WARS Dress!

    cat-west-kaskade-nexus4x4

    #2 from last week:  Chauvet Professional Blog home page!!!  Thank you so much everybody!

    PLASA-2013-Chauvet-Professional-34

    #3 from last week:   Professional’s NEXUS 4X4 Nominated for a 2013 Parnelli Award!

    parnelli-awards-logo

    #4 from last week:
    Be Careful of FALLING TRUSS!

    falling-truss

    #5 from last week:  Weekly SWAG Contests with Chauvet Professional on Twitter and Facebook!

    trusst-gloves-swag-tuesdays

    #6 from last week:  Atmosphere Tour Teaser, with Nexus 4X4 and Geyser RGB!

    kaskade-atmos13

    #7 from last week:  TALK September 2013: LOAD OUT!  A Mike Graham Exclusive!

    MIKE-GRAHAM

    #8 from last week:  Professional’s TOP YOUTUBE VIDEOS of the Month!

    Chauvet-Professional-WFX2013-17

    #9 from last week: Got A Case of the Mondays? How About Some Awesome Grooves?

    case-of-the-mondays

    …and last but not least on our list, last week’s #10 most visited post:  Audioslave – Like A Stone for A Little Wednesday Lunchtime Rock

    audioslave

    Your Top 10 Favorite Posts from Last Week on the Chauvet Professional Blog!

    We LOVE seeing what you like to read on the Chauvet Professional Blog!  it helps us put out better, more informed stories and information — keep it up!

    Here’s what the Chauvet Professional Blog readership found to be the best posts from last week, September 15-21, 2013.  Counting up from the most popular:

    1.  Cat West, Lighting Director for KASKADE, Rocks the Rig AND the Star Wars Dress!

    cat-west-kaskade-nexus4x4

    2.  Multitasking Color with COLORado 4 IP from Chauvet Professional!

    colorado-4-ip

    3.  LEGO Concert Kit? YES PLEASE!

    lego-concert-20

    4.  Kaskade’s Atmosphere Tour Teaser, with Nexus 4X4 and Geyser RGB!

    kaskade-atmosphere

    5.  This Week on the Chauvet Professional Blog, Sept 16-20, 2013

    your-chauvet-pro

    6.  TECH TALK September 2013: LOAD OUT!

    flight-case-road-case

    7. BE CAREFUL of Falling Truss!

    falling-truss

    8.  Our Favorite TECH TALK Articles from Mike Graham!

    MIKE-GRAHAM

    9.  Stevie Ray Vaughan Plays Texas Flood on the Chauvet Professional Blog

    srv-texas-flood

    10.  CHAUVET Professional Supports Wakefield’s Backstage Academy with Q-Wash 560Z

    Backstage-blog-4

    Thanks for reading, everyone!  Got a suggestion for a story?  Email us!

    This Week on the Chauvet Professional Blog, Sept 16-20, 2013

    Another week has come and gone here on the Chauvet Professional Blog…  we sincerely hope that it has been an amazing week for you and yours, and that you got through every load-in, every performance,, and every load-out like it was your first and last!  For those of us in this industry, it’s amazing to do the work we do – arriving at an empty venue and leaving it as you found it, yet hours and pounds of sweat later.

    We really do work in the best industry!

    Let’s recap what went on this week on the Chauvet professional Blog — it was an awesome week, and you all seemed to love what we had to say!  Check out a recap of this week’s post goodness!

    Got A Case of the Mondays?  How About Some AWESOME Grooves?

    case-of-the-mondays

    TECH TALK September 2013:  LOADING OUT

    flight-case-road-case

    A LEGO CONCERT KIT?!  YES PLEASE!

    lego-concert-1

    What is YOUR Chauvet Professional Lighting?

    your-chauvet-pro

    KLF (Uh Huh Uh, Uh Huh Uh Huh):  Hump Day Energy!

    HUMP-DAY-CAMEL

    Our Favorite TECH TALK Articles from MIKE GRAHAM!

    MIKE-GRAHAM

    KASKADE’s Atmosphere Tour Rehearsal Teaser, with NEXUS 4X4 and Geyser RGB!

    kaskade-atmosphere

    Stevie Ray Vaughan Playing TEXAS FLOOD on the Chauvet Professional Blog

    srv-texas-flood

    Multitasking COLOR WASHES with the COLORado 4 IP!

    colorado-4-ip

    Thanks for reading, everybody!

    Our Favorite TECH TALK Articles from Mike Graham!

    MIKE-GRAHAM

    Every time we look over at Mike Graham, one of our resident human walking awesomesauce packets, we can’t help but wonder how he fits all of that knowledge into one polo shirt wearing container.  Mike provides great articles for Tech Talk here on the Chauvet Professional Blog, full of insight and hard work from his years in the business.

    We decided to look through the last few years of Tech Talk articles and pick our five favorites.  Check them out!

    TECH TALK:  How Many languages Do You Speak?
    Chauvet-Coachella-1

    TECH TALK:  Video in the World of Lighting
    Part One
    Part Two
    Part Three
    Video-wall-2

    TECH TALK:  Keep Your Movers Moving

    q-wash-436Z

    TECH TALK:  16-Bit Dimming for LEDs

    Microsoft Word - Document2

     TECH TALK:  LED Lights, Camera, Action!

    LD-class-6-blog

     Stay tuned for more Tech Talk articles and more from the Chauvet Professional Blog!

    TECH TALK September 2013: LOAD OUT!

    flight-case-road-case

    LOAD OUT

    One of the happiest times of any show is the completion of load out.  Especially if it is complete before  last call at the nearest bar.  However, load out is also, in my opinion, is often an overlooked event of show planning.  By organizing your load out in the same fashion as your load in, you can be sure that there is a cold beer with your name on it waiting for you.

    The best time to start thinking about load out is during your show design.  At the same time you are thinking about how cool your show will look, and how much it is going to cost to load it in, you have to already be thinking about how much it is going to cost to load it out.  Typically, your goal is to make sure that your rig can come down in less than the four hour minimum that you often time have to pay your crew.  So, in the same way you can estimate how long it will take to load in, estimate the load out as well.

    During your show pack, keeping track of exactly what goes into what box is really important.  Having a complete and accurate packing list as critical for load out as it is for load in.  Knowing what needs to go back into every box will greatly assist you in keeping your pack time down.  This will also help you to make sure that everything that you brought to the show goes home with you.  It is also a great idea to label each case that you take with you.  On that label, you should have the following listed:

    • Your show name
    • Names of items
    • How many of each item
    • Road case number (of total cases)

    When you get to the venue and start setting up, As you empty cases, use the empty cases to store your truss carts.  Make sure that you label the cases your truss carts are in so you can easily find them, but this will keep them all in one place and save you time in looking for them at the beginning of load out.  Making sure that all of your cases are prepped to return in the order that you will need them is also really helpful.  I also suggest that having all of your spare items in its own case so you can easily find them if you need them.

    As you get to load out and your cases start showing up, keep them in order.   As you load one up, the next one you need is there for you to use, this will also keep your “case clutter” to a minimum.  Once you load a case, get it moved away from your work space and staged for packing back into your truck, then load the next one.  As to cables, I suggest taking all cables that five feet and under and bundling them in packs of 10.  This will make counting them easy and they can be easily stored.  Typically, the most common lengths of cable are 5ft and under, so you will save tons of time by not rolling them up individually.  As you get to your trussing dollies, set them up and keep them to the side until you need them.  Always load your cases outside of your rig s footprint.  This way, you can keep dropping your rig to the ground without having to move a bunch of half full cases around.

    Keeping the process moving is important.  By the time that load out comes, everyone is getting worn out and could be getting a little complacent.  Keep an eye on how your gear is being packed is important, especially if you are working with a local crew that is not going with you to the next show. Firstly, you need to know where your gear is getting packed, but you also have to make sure that they are not just jamming it in a case with no care.  Also, because it is the end of a long day, or in many cases, a long few days, your crew will be tired.  Make sure that they are still following safe practices and not standing on the “OSHA approved chair” for taking lights out of the rig.

    Remember that load out is not complete until all of your gear is on the truck and the door is dropped.  It is important that not only is all of your gear in on piece, but so is your crew.  Keep safe and stay organized and you will all make it before last call.

    Stay tuned for more Tech Talk articles from Chauvet Professional — we’re here to help you own the road!

    Tech Talk: Keep Your Movers Moving

    Mike Graham comfortable in the spotlight.

    Mike Graham comfortable in the spotlight.

    Written by Mike Graham, product manager for CHAUVET Professional.

    Broken lights are a nightmare. Moving lights are more so because they are complex machines that seem to never break down in an easily accessible location. Unless you have a magic wand in your toolbox, you will encounter broken moving heads somewhere in your lighting life.

    An ounce of prevention:

    Firstly, in order to try to keep lights from breaking, preventative maintenance is a great place to start.  Developing a regular schedule of checking under the covers will help you head off problems before they come up. I typically suggest a quarterly inspection for normal usage, if you are on a tour or in a club situation, then a monthly inspection may be a better plan. A few things to check for are the following:

    Check belts. Are all of the belts tight enough and do they look worn at all? Belts should look almost like new all of the time. They should not show any signs of ripping or fraying. To make sure that they are tight enough, you should be able to twist them 90 degrees with a little force, but not much more than that. If the belt won’t turn at all, it is too tight, if it just spins to 180 degrees, it is too loose. This is a good rule to go by.

    q-wash-436ZCheck fans. Are the fans clean? If not, you can use an air hose, but make sure that you are not allowing the fans to free spin with the air hose. While it sounds cool, you are causing major damage to the fan and to the driver PCB that the fan is attached to. Free spinning fans causes electrical feedback to the PCB and will damage the brushes inside the fan itself.

    Clean optics. Is there any gunk buildup on your colors, prisms, lenses, or gobos? Cleaning your optics is important because you lose a ton of light when your effects are dirty. I strongly suggest using a lint free micro fabric cloth to clean off all of these components. Also, do not spray anything onto the colors or gobos. Spray the cloth. This will help to prevent spots on your optics, and also prevent overspray into the rest of the fixture.

    Check connections. Are all of the wire harnesses properly connected? Make sure that everything is plugged in tight and that the cables are not crimped in anything.

    Clean the base. Is there any dust build up in the base? This is especially common in night clubs. Fans suck in everything from hair, to smoke, to confetti. This tends to build up on top of the power supply and main PCB. Make sure that you clean all of this garbage out of the base. This will extend the life of your power supply and main PCB greatly. Remember that these items are really expensive to replace out of warranty.

    Taking the above steps will really help in extending the life of your investment.

    boxes-load-inLoad in check out:

    So, it’s 6 a.m. and your coffee has not kicked in yet, but nonetheless, you are at load in. This is when you have your last chance to check your lights before you put them someplace where a problem is going to be harder to deal with. When you take the fixture out of the case, look at it. Make sure that none of the covers look out of place. Make sure that they are also on tight. Give the fixture a little shake and listen for any kind of lose items rattling around inside the fixture. Now hang it on the truss. Plug it in and run it. This is also a good time to make sure that your pan and tilt locks are off. Even if you do not have data run to the light yet, you can check the functionality of the fixture itself. Typically, if the fixture homes properly with no error codes, it is good to go, but I like to take it one step further and make sure that the lamp turns on (if it is a discharge light) and that the shutter blades open. If it is an LED fixture, run the virtual dimmer and shutter to full to make the LED come on. In both situations, you should see a bright white light and no gobos, colors, or prisms in the field. As only as you only see a bright white light, you should be in good shape. If you can add data, this is even better so that you can make sure that you can control everything. I also like to keep checking everything as the rig is going up. A ton of things can happen to your lights during their trip up to trim. Keep an eye on your gear as it moves.

    Q-Spot 560-LEFTAnd then, the inevitable happens:

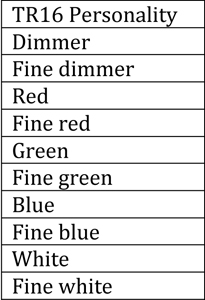
    So, something broke. Now what? Typically there are symptoms of problems. For example, let’s say that you have no control from the console to the fixture, but the fixture works fine in test or stand alone mode. It could be a bad cable or a loose connection. It could also be that the fixture is in the wrong personality, the address is wrong. On the controller side, it could be a few things there as well. Did you just update firmware in your console?  In that case, the personality could be wrong in the console. The patch could be messed up, Are you using Art-Net? There could be a problem in a router or your Art-Net to DMX box could be behaving badly. I like to check the micro issues before I check the macro issues.  The above is the order that I would check this kind of problem. Each one is quick in of itself, but depending on your crew, could take a few minutes to check. When you find out what the problem was, write it down. Keep a log of every issue you have. Eventually, you will have a database of problem solving. When I worked on ships, I kept a log of the problems that I had in each showroom. This way, when I moved on to my next ship, the incoming lighting person would have something to start with. An entry might look something like this:

    rig-moving-heads“Aug. 16, 2001 — fixture X needed lamp replacement. When the fixture was opened, not only was the lamp bad, but the base of the lamp had shattered inside of the holder. I removed the base of the lamp and found that the porcelain in the socket was cracked as well. I replaced the lamp socket. As a tip, make sure that the brand of lamp does not change. The bi-pin base of the lamp can change slightly from manufacturer to manufacturer.”

    Keeping notes like this can be tedious, but can and will save you time in the future. It also helps greatly when you are on the phone to technical support. The person you call for technical support genuinely wants to help you with your problem. They are going to ask you questions such as:

    • Where are you located?
    • Do you have a phone number and e-mail address to reach you?
    • Are you on a show right now?
    • Is the fixture still in the rig?
    • What kind of controller are you using?
    • What kind of power are you using?
    • How many fixtures do you have power-linked together?
    • How many fixtures do you have data linked together?
    • Are you using an opto splitter?
    • Are you using Art-Net?

    Knowing the answers to the above will be really helpful. Especially if you are either on a show at that moment, or are away from your lights that you are calling about.

    ldi-setupSafety first:

    If you are having any kind of mechanical problem with a light, you need to unplug it from the rest of your rig immediately. Not only power, but data as well. A bad fixture can cause you data problems up or down the line. If for some odd reason there is a bad enough problem, it is possible to get a voltage spike in the data cable that can cause your opto splitter to fry, and if you don’t have an opto splitter in line, then your console is in danger. (This is why I ALWAYS have each universe of DMX isolated with an opto splitter between the console and the first fixture) If you do have a light that is down and it is 30 feet in the air, leave it there until it is safe to actually get to it. Don’t just go climbing up the truss to replace it. Keep a rope in your road box that is long enough to pull a fixture up and drop it down. I keep a pulley in my case for this as well. If something seems like a bad idea before you do it, most likely it is.


    Tech Talk: “On Tour: Tait Stages” or Watchable Reality TV

    Mike Graham comfortable in the spotlight.

    Mike Graham comfortable in the spotlight.

    Written by Mike Graham, product manager for CHAUVET Professional

    I was flipping through the guide a few weeks ago and stumbled on a reality show that cannot possibly be staged. Reason being: it’s all about building stages. “On Tour: Tait Stages” gives a pretty realistic view of what goes on from planning a show all the way to the first few load ins. The AXS TV website describes it as “a documentary series following the employees of Tait Towers and its clients with a behind-the-scenes peek into the world of designing, building, and touring stage sets.”

    While I have never tried to pull off anything as complex as what Tait Towers does every day, I can find this show easy to relate to as the process, no matter the scale of a show, is still the same. As I consider myself an industry professional, my wow factor is set pretty high—I am not easily impressed. However, I can freely admit how extremely impressed I am with how this show is put together. The access that Tait Towers allows the camera crew is pretty stunning.
    Tait Towers Bon Jovi Hexs

    Without revealing any top trade secrets, I think it is cool that they show as much as they did during the planning stages of the Bon Jovi “Because We Can” tour. Specifically, the scenic design going through revision after revision while trying to get elements built so that the build process would not fall behind. Without ruining the ending for you, they did succeed. As for budget, well, they never brought that up.

    During the Madonna “MDNA” load in, they showed how they label their scenery carts. They not only have their logo on it (so you can see who it belongs to), but also its stage location, the items that are on the cart, as well as a 3D CAD rendering showing how the items on the cart go together and how they are used in the final assembly. For me, this one bit of insight was worth watching the whole show.

    It was really cool to see how the different teams of designers, fabricators, accountants, MP900402515and clients all work together. It is extremely apparent that there are major stressors at play during the filming.  Deadlines do not change, even when the plans do. Problems come up in the real world, and they have to be dealt with before they get out of hand. Watching someone else deal with these never-ending issues is a great learning experience for all of us.

    This show gives us an inside look at the touring industry from an insider’s point of view. While watching, I am taking away from it as much useful information that I can. For someone outside of our little world, it is good entertainment and should make people realize that the show does not appear from nowhere.  It takes time and effort to make it look awesome. It is also vindication to anyone whose parents told them there is no money in rock and roll.

    For anyone with an interest in this industry — and I would assume that you do, as you are reading this technical tip — I would strongly suggest checking this show out:

    ON TOUR: TAIT STAGES – Bon Jovi’s “The Hexes” – Part 2 from Dialogue Pictures on Vimeo.

    Tech Talk: No Effect Before Its Time

    Mike Graham comfortable in the spotlight.

    Mike Graham comfortable in the spotlight.

    Written by Mike Graham, product manager for CHAUVET Professional.

    Building up anticipation is a powerful tool. You hear it in music with the lead up to a crescendo, you see it in a suspense movie, you read about it in great works of literature. But…you are supposed to also see it in lighting.

    I. Start small, go bigger:
    One of the things about a great light show is to create a sense of anticipation in the audience. The key to this is to not give away all of your tricks in the first 10 seconds of the show. Take your time. Bring in effects slowly over the course of a show. I’m not saying to make the beginning of your show boring. On the contrary, make it dynamic with moving heads with sharp focus and no gobos positioned at contrasting angles. Use your static fixtures in primary colors. If you are using video panels, keep the content basic. As the show goes on, start adding in effects slowly. Add in gobos to the movers, start using mixed colors in your pars. Always hold something back to be used at the right moment. Having spinning gobos and prism wheels for the entire show is going to get really old quickly for the audience; however, using it when it makes sense is really effective.

     VeeLounge-sp2II. Effective effects:
    Adding effects when the time is right is really important. If a song does not call for a strobe effect, don’t use it. You have to make sure that your design ideas make sense. For example, having massive color changes and your moving heads in an offset can-can for a dramatic slow song is a really bad idea. However, you can do a nice blue stage effect with some red or purple overtones — this will look really nice. Add in a few break-up gobos on the backdrop and now you have something really sweet. If you are covering “Pinball Wizard,” then having the movers going crazy with massive color changes makes perfect sense.

    VeeLounge-sp1III. Cue structure:
    Cueing is really important. Or at the very least, make sure that you know what material you are lighting, so that you know when to make a change. For the lights to match the subject you are lighting, you have to have motivation from the stage colors to change. I’m not saying that the cues have to be predictable, but if your talent is standing stage left, making the lights move to stage right is not a good idea. You have to wait for the time to be right. Hitting “go” at the wrong time can really mess up a show. This is particularly true for magic acts, acrobats, and jugglers. If you mess up one of their cues, it could mean a trip to the hospital. Again, anticipation of a lighting change is a powerful thing. You are creating an imaginary experience for the audience. It is up to you to accent what is happening on the stage. The light has to convey the right message to the audience and it has to match the action on the stage.

    VeeLounge-sp3All in all, the idea of good lighting is to make sure that something that is happening on stage motivates you to create a lighting look. Using that motivation will ensure that you have created a design that will make the audience appreciate the show that you have worked so hard to design. Let the show content guide you in your design and you will almost never be wrong.

    Tech Talk: Know Before You Show

    Mike Graham comfortable in the spotlight.

    Mike Graham comfortable in the spotlight.

    Written by Mike Graham, product manager for CHAUVET Professional.

    Since my son was born 6 years ago, I have had a lot of experience with “some assembly required,” then having to show him how to use the thing that I just spent way too long building. Reading the manual helps a lot with situations like this, and also having some time to play with it first before showing him how to use it. Admittedly, sometimes I have a hard time giving up the new toy and letting him play with it.

    I. Read the manual. Reading the manual may not seem like an important thing, but to be honest, it is really important, especially when you are using a fixture you have never used before. The manual will have important information on rigging, operation, power specification and installation. All of this is pretty important when you have your brand new light and you are trying to guess how to hang it, set a DMX channel, or navigate through the menu map. By guessing on how to operate or hang a fixture, you may end up damaging it before you even get to use it. Reading and understanding the specifications of the fixture will also help you to better apply the fixture to a particular situation.

    toy-houseII. Check out the light before the show. Playing with your new light before you get to a show is also a great idea. This will prevent you from having to do on-the-job training and not being able to fully utilize the awesomeness of the fixture. There is nothing worse than walking in to program something, looking up and not knowing the gear that is in the rig, or how to utilize it. I love setting up lights in my living room and getting a chance to see how fast it pans tilts, and what colors look best plastering the walls. It is also a good time to work with a new fixture without any distractions. This is also the perfect time to make sure that the fixture profiles are working properly and that you will not have any on-site problems that could have been caught beforehand.

    instruction-manual-1This is even more important when using multimedia gear like projectors or video walls. Not knowing the ins and outs will add a lot of time into the programming of your show and could cost you future shows with the same people. It is really apparent when you are trying to figure out something on the fly. The sweat dripping off your forehead is a dead giveaway.

    Chauvet provides great documentation including manuals and quick resource guides for all of the products. We also have product videos that show exactly what they can do. This information is available at www.chauvetlighting.com. I highly suggest checking it out, as it is a great resource of information and inspiration for making your show a success.

    Tech Talk: 16-Bit Dimming for LEDs

    Mike Graham comfortable in the spotlight.

    Mike Graham comfortable in the spotlight.

    Written by Mike Graham, product manager for CHAUVET Professional.

    The latest push in the world of LED lighting has been control of said LEDs. Dimming has been a problem since the beginning of LEDs in the entertainment industry and has effectively made it so that it is unacceptable to many lighting designers to use LEDs for anything except scenic elements and highlighting. For some reason, having a ‘steppy’ low end that looks like a flat tire sounds is a bad thing.

    Chauvet has done some amazing things over the past few years with regards to this problem. We released fixtures with built-in dimming profiles a few years ago in the COLORado, COLORdash and Q-Series of products to help with the visual version of ‘thump thump thump,’ and that helped a lot. Doing a fade from 50% to 0 over a few seconds now looked a lot smoother. The bar has been raised again.

    Several manufactures (including Chauvet) are introducing 16-bit LED dimming, which virtually eliminates any remnants of the dreaded ‘steppiness’ that has plagued the industry for years. Chauvet has already released several products with 16-bit dimming included, such as the Ovation series or COLORado 4 IP to name a few.

    Microsoft Word - Document2Sixteen-bit dimming offers the user the ability to easily control LED dimming just like you would control fine pan and fine tilt. As always, there are 255 steps of control in 8 bit (standard) dimming control. With the fine control offered in 16-bit mode, there are 255 additional steps between each step of the standard 8-bit dimmer channel. This additional level of control allows the fixture to act much more fluid in dimming, especially at the low end where it has always been problematic. In the DMX personality, the channels would be set up like in the image at right, in the case of the COLORado 4 IP.


    Microsoft Word - Document2

    If the profile is set up correctly on your console, all you will see is something similar to the image on the left. This is because the person who built the profile has already incorporated the normal operation with the fine control, in the same way that fine pan and fine tilt are included in the parameters for pan and tilt in most personalities. If you could see the values of the 16-bit channel move during a cross fade, you would see the numbers whip from 0 to 255 and back again faster than you could possibly read them. However, if you are using a fader controller, you will still have to use the fine channels for tweaking your color output and is most useful in the very low end of control. What I would suggest is to have the main control at your desired level of output and the fine control at full. I would suggest dragging the main level to zero during dimming and drag the fine control to zero following the main control. This will give you the best control of the low end in a manual situation.

    As a final tip, in any 16-bit control situation, it is important to turn off any dim setting or dim curve settings. They should be both turned off so that there is no conflict between the controller and the fixture. Keep in mind, those settings were designed to help the fixtures compensate for 8-bit control. As long as you are using a 16-bit personality, your fixture does not need any help on low end dimming.